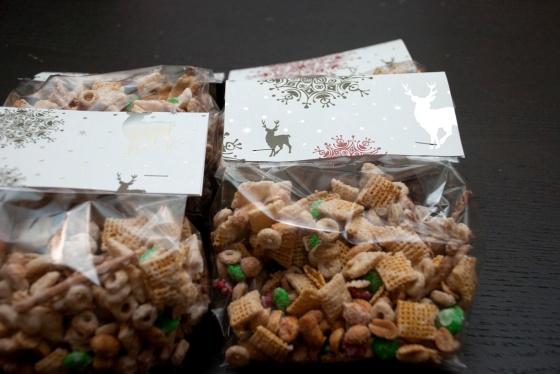
Ok, so I know that candy isn’t really a craft, but it’s definitely part of Christmas! I have two candy recipes for you today. I have to admit, I didn’t really keep track of how much the supplies for each of these recipes cost, but I’m sure it’s under $15. I made these candies for my teammates at work and Cora’s daycare teachers. I bought the plastic bags for $1.99 for 25 and the Christmas paper was around $.59 each.
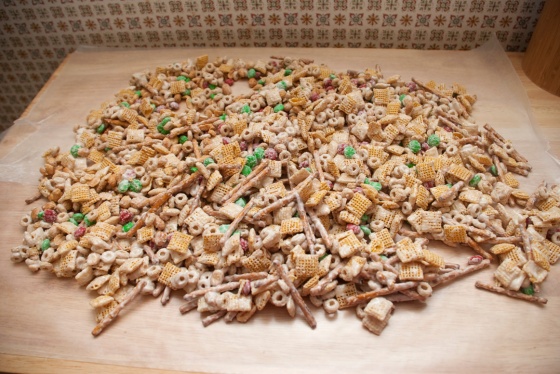
The first recipe is for a holiday candy mix I make every year. My mom got this recipe from a coworker of hers many years ago, and it’s always really popular.
Recipe
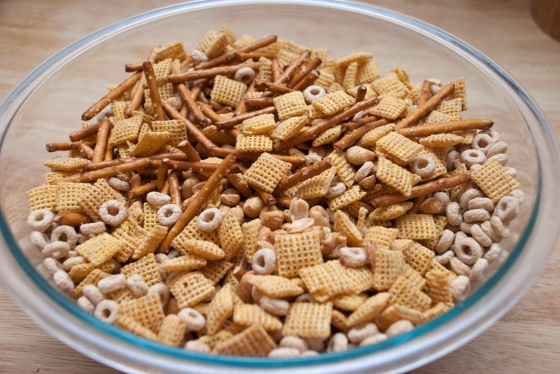
3 cups Cheerios
6 cups Crispix or Chex
2 cups Salted Peanuts
2 cups Pretzel Sticks
8 oz Holiday M&Ms
16 oz Vanilla Candy Coating

Mix the Cheerios, Chex, peanuts, and pretzels together in a large bowl and set aside.
Melt the vanilla candy coating in a double boiler. Be careful to not overheat the candy coating, it will scorch and not taste right and get thick and yucky.

Once candy coating is melted, pour over dry ingredients and mix well. Add the M&Ms and stir to coat. Spread the mixture out evenly over wax paper to cool and harden. Once cool, break apart.
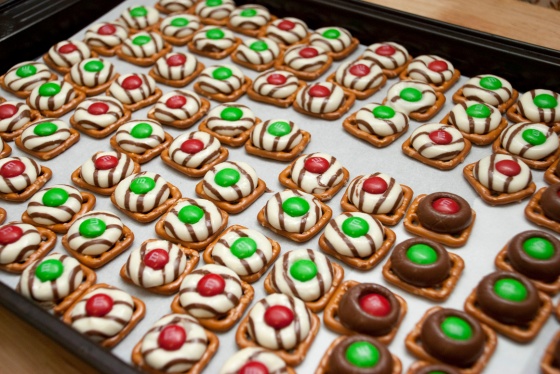
The second recipe is for M&M buttons. You need square or circle pretzels, Hershey Kisses and/or Hugs, and holiday M&Ms. Preheat the oven to 200 degrees and line a baking sheet with parchment paper. Lay pretzels out flat on the baking sheet. Place a Kiss or Hug on top of each pretzel.


Once oven is heated to 200 degrees, place the baking sheet on the middle rack for 4-5 minutes. You want the chocolate to be shiny, but still holding its shape. Once the chocolate is melted, place an M&M on top of each Kiss or Hug and push down. Let cool for about 30 minutes.
I packaged my candy up in plastic treat bags and topped the bags with a piece of 5.5″x6″ scrapbook paper folded in half and stapled to the plastic bag. I ran out of skinny ribbon to embellish the top, but it adds a nice touch if you have it. If you don’t, they still look nice without the ribbon. Enjoy!